|
This page provides a walkthrough of all the primary missions in Far Cry 2. These missions are picked up from both the UFLL and the APR.
Most primary missions have two different paths. You can complete a mission as specified by the ones who provided the mission - in other words, you just do as you're told. A second path is provided by one of your buddies who will offer a subverted version of the mission. Shortly after you pick up a mission from either the UFLL or the APR you get a phone call from one of your buddies, more specifically the one with which you have the highest history. That person will offer to subvert your current mission. This means that the objective of the mission may change and get slightly easier or harder, but all in all that the entire mission comes with a higher risk. If you accept the offer from your buddy, he'll personally get involved which more often than not will put him in harms way. However, completing a subverted mission provides you with an additional reward besides the standard diamonds you receive from the UFLL or APR. The reward for each subverted mission differ - see the specific missions below to learn more about their rewards. Please note that if you subvert primary missions, any earned upgrades to your safehouses will only apply to the district you're in - ie. subverted missions in Leboa-Sako will only upgrade safehouses in that district. However, once you reach Bowa Seko it seems that all your safehouses in that district from the start will have an Assault Truck parked outside.
This page was originally written when I first played through the game, "working" for the UFLL. While the missions only differ in very small ways depending on which faction you're initially recruited by during the tutorial, I haven't had a chance to describe this in all the missions - especially those available in Bowa Seko. Perhaps I'll get a chance to finish up the page soon.
Once you gain control of your character at the hotel, you're in the tutorial section of the game. Although your objective will tell you to get out of town, it doesn't really matter what you do - if you get severely wounded you'll move to the next part; if you manage to escape the town, you'll pass out and move to the next part. Get the picture?  If this is the first time you play the game, I'd suggest that you explore a bit, and perhaps move outside in the streets to get your first feeling for using guns in the game. As stated, though, you'll eventually go down one way or the other. If this is the first time you play the game, I'd suggest that you explore a bit, and perhaps move outside in the streets to get your first feeling for using guns in the game. As stated, though, you'll eventually go down one way or the other.The next part takes place in one of four areas. Which area you start in depend on which one you're closest to when you finish the first part; ie. if you escape the town going north-east (or pass out in the north-eastern part of town), you'll start the next part at the Fresh Fish area. All four parts play out pretty much the same, the only difference being the actual setting. The game will take you through some of the different game-mechanics - how to heal yourself, repair vehicles, etc. You'll also get your hands on some weapons, unlock your first safehouse, rescue a buddy, find your first diamonds and learn how to deal with your malaria condition. Your starting weapons will include a Star .45 pistol and a G3-KA4 assault rifle; you'll also get either a RPG-7 Rocket Launcher (Lumber and Fresh Fish) or a LPO-50 flamethrower (Slaughter House and Cock-Fights). |
| Reward: | 15  and reputation; for the subverted mission you'll also gain buddy history and a safehouse upgrade (you'll find an Assault Truck parked outside your safehouses) and reputation; for the subverted mission you'll also gain buddy history and a safehouse upgrade (you'll find an Assault Truck parked outside your safehouses) |
As you make your way up to Leon Gakumba of the UFLL, you'll hear him and another person talking about the mission ahead... or at least what it's about. Some guys with big guns have apparently moved in on a mission to stage some sort of attack. The UFLL are afraid they'll get blamed, which is causing concern.As you can hear from the briefing, you're going up against some Special Forces - well, sort of. Your target is their vehicles and the equipment in them; doing so will force them to abort their mission. Apparently they're there to kidnap someone from the APR - the UFLL is not only concerned about blame, but allowing the Special Forces to succeed would apparently leave the UFLL with no-one to fight! Man, that's some crazy logic... I guess that just illustrates how messed up the factions really are. | Although your target is a specific truck, getting to it is easier said than done. There are a total of about 7 or 8 enemies at the Oasis. They're not that heavily armed, but you're still going up against sniper rifles and AK-47's. The Special Forces have setup a small camp there with gun emplacements, ammunition and explosives piles and health supplies. Even though I personally tried to sneak my way in, during the night, I was quickly spotted; whether this was simply because of poor execution on my hand (the most likely), it seems that getting close enough can be tricky. The truck you're after is parked around the back - you'll recognize it by the stuff it's got in the back. Simply blow it up - a grenade will do - and you'll complete the mission. |
Your buddy will meet you at the safehouse to the south-east in the eastern region of Leboa-Sako. Inside, you'll be able to find a MGL-140 grenade launcher that your buddy brought along. He'll inform you that the commandos are here to kidnap him! He knows about an informant, a Belgian, who's working for the commandos - you'll need to get to him and persuade him to send the wrong coordinates to the commandos so that they will actually walk into a trap at Mokuba. The Belgian is located at "Private Property" to the north-west.At "Private Property" you'll find the Belgian on the first floor of the mansion. There are guards around, so you probably want to eliminate them first - or at least thin them out. Once you reach the Belgian, approach him and press the Use key to "intimidate" him - you'll stick your machete to his throat and pass him a document with the new coordinates for the commandos. Wait as he sits down and calls in. Once you're objective is updated I guess the Belgians fate is in your hands. I'm not sure if sparing his life, or killing him, has any effect on the mission - or the rest of the game, for that matter. From what I've seen so far, though, it doesn't seem so. Anyways once you're done with the Belgian check your phone - your buddy will inform that you need to head to Mokuba since the Special Forces are getting close, and that it'll be easier to destroy their equipment while they're engaged with the APR forces stationed at Mokuba.At Mokuba all you need to really do is to destroy the truck marked on your map. The area has many militia around, so getting to it can still pose a problem. Once you destroy it, you'll complete the missiom. However, before you destroy it, make sure you have a relatively safe path out of Mokuba to the south... because once you do destroy it, you'll need to go help your buddy. He'll phone you and let you know that he's caught up fighting the commandos, and he requests you help ASAP. Head south towards the checkpoint. If you're armed with a sniper rifle, start scouting the area ahead for enemies; pick them off if you can - just notice that your buddy is there as well, so make sure that you only target hostiles. |
| Reward: | 15  and reputation; for the subverted mission you'll also gain buddy history and a safehouse upgrade (you can find a single syrette health supply inside the safehouse) and reputation; for the subverted mission you'll also gain buddy history and a safehouse upgrade (you can find a single syrette health supply inside the safehouse) |
Once again you're treated to a few bits of information as you head up to Gakumba. Well, sort of - they keep mentioning gold. A wealthy king has returned to the country after being in exile. He is trying to buy off the factions, but the UFLL is afraid that the APR will make it off with all the gold. To complicate things, they believe the king is trying to restore his legacy by doing a few good deeds, and then pass the throne onto his son... something that the UFLL cannot accept. Your mission is to locate the gold in the north-eastern desert and use your cellphone to provide the location to the UFLL.| The gold is located at the Oasis in the north-eastern region. The fastest way to get there is to take a bus to the region; there's a car parked right outside the Bus Stop there. At the Oasis you will find about 6 or 7 enemies. Since the landscape is pretty open, it should be easy to spot them and take them down. Brute force is an excellent approach, and a sniper rifle will quickly get the job done. The gold is located in a hole at the middle of the Oasis. Climb down the two ladders and simply Use the gold to send the location to the UFLL. Once done, the mission is complete. |
Your buddy asks you to meet him at the safehouse in the south-western part of the north-eastern region. Inside you'll find your buddy along with a AS50 sniper rifle. If you didn't bring a sniper rifle, you may consider taking this one as it'll come in handy soon enough. Your buddy provides some more insight into the situation - the king basically drained the country for every drop he could get and left it in a state of civil war. Your buddy wants you to kill the king, take his signet ring and bring it to his son, Prince Oeduard, who's going to be at the safehouse once the king is dead.The king is located at the Fort, so that's your first stop. As you can imagine, the king is not alone. There's plenty of enemies at the Fort, including two snipers positioned in two of the towers. It's a good idea to take them out first, since they're likely to spot you while you're still a good distance from the Fort proper. The enemies are armed with standard weapons - assault rifles and pistols. They shouldn't pose too much of a problem, although you should move slowly through the Fort. If you rush it, you can easily get surrounded in a fire-fight. Once you've cleaned up the place, head to the eastern building and up the stairs; as you approach you'll hear the king complain about the situation the country's in. The king is alone; he does carry a gun but unless you really mess things up, he shouldn't have a chance to use it. Take him out and pick up the signet ring from his body.Make your way back to the safehouse, where you'll meet Prince Oeduard. As a sign of his appreciation he gives you one of his vehicles - a Jeep Liberty that is parked outside the safehouse. Now you'll need to go to the Oasis and tag the gold for the UFLL. Oeduard has made sure that the APR militia there has left the Oasis, and your buddy has gone in advance to secure the gold. Go to the Oasis and get ready to tag the gold. Before you do, I suggest that you save the game. Once the gold is tagged, you'll complete the mission; however a number of militia will come rushing in - there's a total of about 8 or 10, so you can easily get overwhelmed. Get out of the hole and take them out. Your buddy is likely to get injured, so be ready to help him if needed. |
| Reward: | 15  and reputation; for the subverted mission you'll also gain buddy history and a safehouse upgrade (full health cabinet at safehouses) and reputation; for the subverted mission you'll also gain buddy history and a safehouse upgrade (full health cabinet at safehouses) |
Some scientists are running an agribusiness under the protection of the APR. Your task is to shut down their operation to send them a message indicating that the APR are incapable of doing their job.| Your target is an irrigation pump located at Occidental Growers Company in the eastern region. Although you're up against the standard fare of militia, this mission can prove a bit more tricky than the previous ones. There are at least two snipers among them, and the vegetation and greenhouses there can make it difficult to spot enemies. I wouldn't recommend trying a stealthy approach since you're likely to get spotted eventually, and you don't want to get caught up in the middle of the area since it's hard to see far. You can try to lure the enemies near one of the gates where you'll have a clearer view - just watch out for the snipers who are not likely to move, even if alerted. Once you've cleared the area you can find the machinery in the eastern greenhouse. You can use pretty much any weapon to destroy it - a few shots from a pistol will do. |
You will meet your buddy in a safehouse near the river in the southern region. Inside you can find a M-249 SAW. He wants you to get a defoliant tank and bring it to the Airfield - he intends to spray the OGC area with it to kill all the vegetation, making it alot harder for the APR to hide in the bush.Your first stop is Claes Products just west of the safehouse - you'll find the defoliant tank there. It's sitting on a table inside the large building. The area has numerous enemies around, however if you bring a sniper rifle it should be easy to thin them out safely from a distance. Move in, grab the tank and head south towards the Airfield. There are no enemies at the Airfield so no need to use caution when you approach. You'll meet your buddy inside one of the houses there.Now head to the OGC. Before you destroy the machinery, make sure you have a vehicle ready - because once you destroy the machinery, your buddy will come flying in (literally) and spray the area. Quickly get into the vehicle and drive south; your destination is the open area south of OGC. Your buddy is about to get shot down and he'll quickly be surrounded by enemies. You should soon spot the crashed airplane; your buddy is slightly further south. Help him eliminate all the enemies and you've wrapped up this mission. |
| Reward: | 15  and reputation; for the subverted mission you'll also gain buddy history and a safehouse upgrade (an ammunition pile is added to your safehouses) and reputation; for the subverted mission you'll also gain buddy history and a safehouse upgrade (an ammunition pile is added to your safehouses) |
As you head up to the APR representative you'll hear him talking about the Jackal. It seems that he's selling weapons to both the UFLL and the APR, cheap. However, your mission has nothing to do with the Jackal; the APR wants you to assassinate the local chief of Police who's friends with the UFLL.| The police chief is driving around in the north-western region. He's a passenger in a Jeep Liberty and he's being escorted by two fully manned assault trucks. If you look at the map you notice that the objective marker isn't moving; once you get close enough, though, they'll start to drive around. They'll drive around in circles, going around the north-eastern part of the region. You can attempt to catch up with them or you can sit back and observe which way they drive, and then setup an ambush at an appropriate position. I personally noticed their pattern and then camped out near the railroad; once they came around again I could easily sniper the entire convoy from a distance. You only need to eliminate the police chief, so I guess you can also make a quick hit-and-run. |
Your buddy will meet you north-east of the Slaughter House. You can find a Carl G Rocket Launcher inside the safehouse here; pick up this weapon to save some time during the next mission for the APR. He wants you to head over to the fishing village and get a book from his brother; apparently, the book contains some sensitive information about some bribes the chief's been getting from the APR. This will cause the police chief to cancel his "parade" and stay put at the Police Station which should make him an easier target. On top of that, when the deputy in the police finds out, he's going to deliver a large quantity of weapons to the UFLL. Your buddy intends to ambush this delivery and asks that you'll be there to back him up. This is by far the hardest part of the mission.| Head north to Shwasana. As usual, there are plenty of enemies here, including a sniper, so a cautious approach is advisable. The chiefs brother can be found on the second floor of the large building at the village; after you intimidate him, he'll tell you where the book is. Pick it up and head out of Shwasana towards the Police Station in the western region. Once at the Police Station you have a couple of different ways to approach the area ahead. If you go across the bridge towards the south-west, you can find an excellent vantage point where you can look over the entire Station area. There are a handful of enemies around, including a sniper and one carrying a RPG-7 Rocket Launcher. Once you've dealt with them, head inside the building to the north where you can find the chief... as you approach I believe you'll hear him talking on the phone with his deputy. Quicksave here. Finish him off and make your way, as fast as possible, towards the east. Your buddy is in severe problems and he needs your help. |
Arriving at the ambush point, you'll notice a large tree blocking the road. Get out of your vehicle and move around the tree and immediately start to finish off the enemies there - a total of about eight or ten are in a fire-fight with your buddy. The Carl G Rocket Launcher may be useful here if enough enemies are close together. In any case, fighting off the enemies is not the hard part - making sure that your buddy lives through it, is. I've often arrived too late, only to find my buddy so severely injured that I had to mercy kill him. If you're dead keen on getting your buddy through you may have to try a couple of times. Also note that while losing a buddy is sad, it's not the end of the game; other buddies will take his place so you can also just live with it. Anyway, once you have finished off all the enemies here you'll complete the mission. |
| Reward: | 15  and reputation; for the subverted mission you'll also gain buddy history and a safehouse upgrade (a fuel pile will be added to your safehouses) and reputation; for the subverted mission you'll also gain buddy history and a safehouse upgrade (a fuel pile will be added to your safehouses) |
As you head up to get the briefing, you'll hear them talking about something shown on TV. Pictures of people dying from disease in refugee camps, and how that'll make people send money to help - only to have that money taken by the APR. Brutal stuff. Anyway, the APR wants you to blow up a traincar carrying some... thing... for the UFLL. It doesn't really seem to matter what it is since they belong to the UFLL. Eventually, though, you'll learn it's natural gas.| The traincar is located at the North Railyard in the north-western region. Head there - I suggest you move in from the east, from the path leading between the two large hills (just north of the safehouse). From here you'll have a great view of the entire area; if you bring a sniper rifle, you can pick off the majority of the enemies present. The traincar is at the center of the area; chuck a grenade at it to destroy it and complete the mission. You can also bring a rocket launcher and avoid the whole "getting personal" part. |
Your buddy will meet you in the safehouse just south-east of the North Railyard. He's brought an AR-16 - a really nice assault rifle with a scope; it's pretty worn though, so if you pick it up, be prepared to unjam it alot. Your buddy tells you that you'll need to kill a guy from the UFLL hiding out at the cattle ranch. The UFLL has a train full of men and he is holding them back. However, your buddy wants them to respond to the action - so you'll need to kill the guy, blow up the traincar, and the troops are sure to respond. Your buddy has a contract of his own, and it's the troop commander, who is also on the train, that he's after; if they respond, his mission will become a whole lot easier. He'll derail the train and confirm the kill. Though, with a train full of UFLL troops your buddy is going to need some help. Queue you.Head to Cattle Xing east of the safehouse. There's plenty of enemies there, and you'll go through a checkpoint on the way. Expect resistance. Clean out the place before you move into the building to get the AFLL guy. He does carry a pistol, but you shouldn't give him any chance to use it. Dispose of him any way you see fit. | Once you've killed him, head to the Railyard and destroy the traincar. If you bring a rocket launcher, you'll make this part of the mission a whole lot easier. If not, refer to the "Main objective" section for tips on how to get through it. Once the car is destroyed, head north-west towards the marker on your map - that's where the train is being ambushed by your buddy. As you get close, you'll realise the scale of the operation - a train with several cars has been derailed. This part shouldn't be too hard - but it may depend on which buddy tagged along, and what kind of weapon he's using. Either way, you shouldn't have too many problems mopping up the rest of the enemies; once you do, you'll complete the mission. Before you leave, make sure that your buddy is OK. |
|
| Reward: | 15  and reputation; for the subverted mission you'll also gain buddy history and a safehouse upgrade (the assault trucks outside your safehouses will have heavy machineguns) and reputation; for the subverted mission you'll also gain buddy history and a safehouse upgrade (the assault trucks outside your safehouses will have heavy machineguns) |
Heading up to get the briefing, you'll hear them talking about the Jackal again. Supposedly, he's got cancer with only three months left to live. How come I'm not convinced? Anyway, the APR don't like that the UFLL got so many vehicles driving around, and they want you to take out a local motor pool... well, some air compressors to be more specific.| The so-called motorpool is located at Scrap Salvage in the western region. The compressors can be found at the very center of the area, inside a small building. There are plenty of enemies around and since you've likely gained a couple of reputation levels from previous missions, they are likely to be wielding better weapons such as FAL Paratrooper assault rifles, SPAS-12 shotguns and PKM machineguns. Furthermore, the junkyard has alot of obstacles - buildings, train cars, and other items - that makes you fight in close quarters. It shouldn't be overly difficult, but it is definately possible to get in some tight spots; you can also easily get surrounded unless you watch your back. Once you've dealt with the enemies, locate the compresser inside the building - a couple of grenades should get the job done. |
Your buddy will meet you in a safehouse in the north-western region close to the Bus Stop. Head there and meet up with him. Inside you can find a USAS-12 shotgun. Before you move onto your primary objective, your buddy wants you to steal a tanker truck schedule from the nearby PetroSahel. The Sahel was recently taken over by the UFLL, and they change the schedules on a daily basis to prevent the APR from seizing the trucks. When you attack the motor pool, the UFLL will call all their trucks back to safety. With their schedule, your buddy plans to ambush the trucks as they head back to base.As stated, your first stop is at PetroSahel to the west. A sniper rifle will come in hand here, not only because there is also a sniper there, but also to pick off enemies from a distance. The fairly open-ness of the area makes a rifle ideal. The schedule you're after is inside a small building on the eastern side. Clear the area, pick up the schedule and head towards Scrap Salvage to the south-east.Scrap Salvage has alot of enemies around it. The first one is stationed to the north-east - if you approach from that side, and you still carry a sniper rifle, you can easily pick him off from a distance. If he carries an assault rifle you may wish to replace your sniper rifle with that. The many objects, buildings, and random junk makes this area less suitable for sniping and an assault rifle can be a better choice. Anyways, finish off enemies as you make your way towards the compressor. Blow it up using a couple of grenades or explosives if you brought any.As soon as you do, you'll get a call from your buddy - he's ambushed the trucks on the north-eastern side of the area, and he's come under attack. Head there as fast as possible - if you have a vehicle at hand use that since if you find enemies along the road you can simply run them down; a cruel but effective approach. Help your buddy finish off the remaining enemies. |
| Reward: | Reputation and a new buddy |
The APR doesn't have a mission for you per se - the doorman at their headquarters will provide the briefing instead. Apparently, the UFLL has a prisoner locked up at the Slaughter House and you think it's worth staging a rescue. It's possible that this mission is only available if you started the tutorial in one of the areas controlled by the APR - at least the first time I played through the game I didn't get this mission myself.This mission is as straightforward as mission comes - all you need to do is head over to the Slaughter House, eliminate the enemies there and then rescue a new buddy from a room inside the large building. While the area does have a number of enemies around it, defeating them all shouldn't be too difficult; the area has three health cabinets available along with an ammunition pile, so there are plenty of supplies in case you need any.Once you've dealt with all the enemies head inside the large building and locate the locked door in the back. Inside you'll find and rescue a new buddy. |
The following missions are basically the same no matter which faction you're working for at this point. The walkthroughs are written as if you picked them up from the UFLL, but they'll be basically the same if you're working for the APR just with different characters - for example, instead of Prosper Kouassi providing the first mission, you'll be briefed by Leon Gakumba instead.| Reward: | 20  and reputation and reputation |
This mission is basically the same no matter which faction provides it - you'll just have a different target depending on the faction. This is a long mission that will eventually take you to Bowa Seko. You'll have to make an important decision along the way, so if there is anything you need to wrap up in Leboa-Sako now is the time to do it; you can return to Leboa-Sako later - however, don't expect to see your buddies again anytime soon. As you head up to Prosper Kouassi you may notice something. Eerie silence. Actually, as it turns out, it's simply because he's alone... still, though, this mission is probably going to change alot of things. He wants the UFLL in the north destroyed - you're going after Leon Gakumba himself. You won't get a call from a buddy this time, so you don't need to focus on other objectives. | Gakumba is located at Goka Falls in the north-eastern region. As you probably know, there's a Bus Stop in that region so fast-travel there to save some time. Head towards the Falls and make your way up the path towards the building at the top - that's where Gakumba is located. There are plenty of enemies around the building - probably 7 or 8 - so approach with caution. Also notice that you may attract enemies stationed below the falls, so be check your back every now and then.Once you've dealt with the enemies, make sure you go around the building to the south-western side and restock on ammunition. You may need it. There is also some health supplies out front if you're low on syrettes - and more inside if you need it later. Before you head in to Gakumba, I suggest you quicksave. Initially you may wish to go inside and see what Gakumba has to say: will tell you that there's money in the drawer; don't get fooled though as he's just trying to get you to turn around and then shoot you in the back. He'll draw a gun and start firing. Shoot him and your objectives will be updated - it looks like the APR has set a trap for you, and the building will be surrounded by at least 10 enemies coming from all sides. Some of them will come storming into the building so be ready for them. Also notice that the enemies are smart enough to know you're in the building, and they are likely to throw grenades at you. This means that while the building can provide a nice choke point, you're pretty much also a sitting duck. I'd take the fight outside, if possible.You can choose a different approach - instead of walking in to Gakumba, you can shoot him from outside the building. In this case you'll have more room to maneuver on, but you'll also be facing enemies from more directions. This part of the mission simply requires you to escape from Goka Falls - so you don't have to fight the enemies unless you want to, or if they're preventing you from escaping. Deal with the enemies any way you see fit.Head down one of the paths leading from the Falls and you'll eventually get a call from Reuben Oluwagembi who requests that you meet him at the Lumber yard in the central region, so head in that direction. Once you arrive, you can find Reuben in the building towards the back. He's got some disturbing news - not only has the APR launched a major offensive against the UFLL, but they've proclaimed that you, and your buddies, are all spies. The APR are headed to Mike's Bar where they intend to line up and execute everyone. Furthermore, they're also rounding up civilians in Pala - and when they get to the church there, they're sure to kill everyone inside... including Father Maliya. This is all sad news and what makes it worse is that you only have time to go to one place - so you'll have to choose between the Bar (your buddies) and the Church (the civilians). Which ever you choose, the next part is going to play out with the same result. If you decide to go to Mike's, there's going to be militia attacking the Bar. Finish off everyone outside and head inside the Bar where you'll find a number of your buddies. A firefight ensues. You'll be overwhelmed by enemies and eventually you'll go down in the fire-fight. If you head to Pala instead there won't be any enemies around. Go to the Church and head inside; talk to Father Maliya. After you push the cabinet to block the doorway, enemies will start to pour through the windows. You'll go down eventually. You'll wake up on the back of a truck. The APR has taken you for dead and you're now - along with a truck full of corpses - being taken to a mass grave in the desert. Things just get better and better! Eventually the truck will hit a bump and you'll get thrown off the truck. You find yourself in the desert in a massive sandstorm. You're wounded, but don't bother healing yourself (you can't, actually). Head forward in the direction you're facing - more or less in the direction that wind is blowing; eventually you'll come to a small house; move close and you'll pass out.You'll wake up inside the house with your old "friend", the Jackal, providing you with some very basic medical attention. He'll give you some insight into the situation; the APR has taken over the northern district, spreading like a disease. A truck will come and the Jackal will make a quick exit. A UFLL mercenary, Voorhees, enters and tells you that they're headed south; you're free to tag along, but they want you to kill Prosper Kouassi first.The APR is holding a parade to the north, and Kouassi is there. Patch yourself up and fill up your syrettes from the health cabinet. You can also pick up the weapons at the hut - the Type 63 Mortar, AK-47 and the Makarov - or you can stop by the Weapons Shop to the north; in this case, bring a sniper rifle to make this part real easy. Once you're ready to move on, drive towards the objective marker; if you approach from the west, you can get a nice overview of the entire parade without being spotted. Once you get close enough, you'll hear Kouassi proclaiming a victory for the APR. You should have a clear look at Kouassi who's standing on a truck. If you brought a sniper rifle, he should make for an extremely easy (and satisfying!) target. If you didn't, a rocket launcher or the mortar should also be enough to ensure Kouassis untimely death. In any case, all you need to do is finish off Kouassi, so you can make a quick hit and run if you wish. There are a number of enemies around, but if you take out Kouassi from afar, you don't really need to engage them.Once Kouassi is dead, head to the southern desert to the objective marked on your map. You now need to meet up with Voorhees at the UFLL command post in Sefapane, in the north-western region of Bowa Seko. This will initiate the next mission. |
|
| Reward: | 20  and reputation and reputation |
This mission is also pretty much the same no matter which faction you're working for. The following description will assume you're working for the UFLL - if you're working for the APR, you'll just be given the mission by Nick Greaves instead.You'll meet Vorhees (or Greaves) at Sefapane in the north-western region of Bowa Seko. Since the northern district of Leboa-Sako has fallen into the hands of the APR, a cease-fire has been agreed in the southern district. As a mercenary, Voorhees is not too happy about it since the situation keeps him out of work. He wants you to bring a weapons shipment into Port Selao under the flag of the APR - that will indicate that the APR are violating the cease-fire and hopefully the heads of the UFLL will get "back into the game". | Your destination is The Jackal's island in Lake Segolo. There is a Swamp Boat located at the south-western side of Sefapane, so grab that and head to Sehlakalase. You'll find the barge in between the large masses of land south-east of Mosate Selao. Once there head onto the barge and up to the white cabin where you'll find the captain. As he explains, things are likely to heat up and he wants you to be on deck to take out enemies. Notice that a Carl G Rocket Launcher is sitting on a crate just outside the cabin; if you don't have a rocket or grenade launcher, I recommend that you pick up the Carl G.Move out to the front of the barge and the captain will start the up barge. There are plenty of enemies ahead both on land and in swamp boats; the boats are outfitted with heavy machineguns. The first enemies you'll encounter are on land just up ahead on both sides. Man the mounted grenade launcher at the front and dispose of them. You'll Shortly after you'll notice an island straight ahead - a RPG guy is located here. You'll also be intercepted by a number of swamp boats, some of them fitted with heavy machineguns. If the barge stops, you'll need to go back and repair the engine. It's located on the deck, in from of the cabin. Further down you'll receive mortar fire. See if you can spot him ahead and take him out with any means possible... a single mortar round is enough to stop the barge. There's an ammunition pile at the back of the barge, and inside a room (also on deck level) you can find some explosives. |
| Once you reach Mosate Selao your objective will be updated and you now have to reach the clinic in Port Selao. There's a car by the Bus Stop so enter that and drive into Selao. The clinic is at the north-western side. Go inside and find Doctor Obua. While you talk to him, you can hear fighting breaking out in the background - the militias have started to fight over the weapons on the barge. As you head out, you'll meet Nasreen (or perhaps another future buddy) who warns you - she tells you to go out the back. Do so and find a way out of Selao. You'll be facing alot of enemies so use everything you've got in your arsenal. I personally went south around the clinic and then towards to eastern gate, staying close to the buildings on the north. There's some cover on the way so use that if possible. |
| As you reach safety, you'll get a call from the barge captain. He's your new best friend and he needs help. Head to the barge... I personally found that taking the Bus from the pier to the Bar was the fastest way to get there. Your mileage may vary. If you do take the Bus, get into the car once you arrive and drive towards the bar - near it you'll drive down a sloping road with an overview of the bay - get out and start to take out the enemies below. Move closer as you thin them out; if you carry a sniper rifle or decided to pick up the Carl G from the barge then this part should be fairly trivial. Once you've eliminated all the enemies, head onto the barge and up to the cabin; talk to Andre to complete the mission. You're now free to roam about in Bowa Seko which means you can pick up new Convoy Missions and Assassination Missions and there's a boatload of diamonds to be found, safehouses to unlock, and just lots of new areas to explore. You'll have access to new buddies and since the UFLL and APR are now fighting again, a batch new of primary missions are also available. The next time you visit a safehouse in Bowa Seko you should be able to meet Nasreen there - however, I've personally met her in different safehouses in each game, so you may have to explore a few before you'll get lucky. If you decided to go to Mike's Bar and attempt to help out your buddies, she'll tell you about your best buddy from Leboa-Sako. Finally you'll also get her activated as your rescue buddy. |
|
| Reward: | 30  and reputation; for the subverted mission you'll also gain buddy history and a safehouse upgrade (you can find a health cabinet inside your safehouses) and reputation; for the subverted mission you'll also gain buddy history and a safehouse upgrade (you can find a health cabinet inside your safehouses) |
As you head up to Addi Mbantuwe it sounds like they're having some sort of problems with civilians. The APR apparently have got their hands on some equipment that can be used to turn a local plant into malaria medicine. The UFLL wants you to destroy the equipment so that no-one gets any medicine.| The equipment you need to destroy is located on the western side of Dogon Village in the northern region. The village is usually swarming with enemies, including one positioned on a roof with a Type 63 Mortar. The dense locations of the huts though ensure that you don't have to fight them all at once, and that you - if you wish - can actually avoid the majority of them. Make your way west and deal with any enemies along the way; the enemy with the mortar is on top of a hut right next to an explosives pile near the center. Watch for tracer rounds as they indicate an incoming shell. The equipment is located on the far western side so follow the paths going in that direction, eventually also moving upwards; you should eventually reach some more stairs going west up into a small alcove where you'll find it. Chuck a grenade at it to destroy it and you'll complete the mission. |
Meet your buddy in the safehouse just south-east of Dogon Village. He wants you to go to a nearby checkpoint and take out a teamster there; this guy is transporting medicine for the APR, and having a look at his papers will allow your buddy to find out where they store all their medicine. So while you take out the equipment, your buddy will make sure to raid their supplies - something that should be a severe blow to the APR.The teamster is located at the Outpost to the east. As usual, there are enemies around - including a sniper located on an observation post. The teamster himself in inside a hut on the eastern side; he's only armed with a pistol so put your attention on everyone else first; you can also simply just focus on him and make a quick escape. In any case, take him out and head towards Dogon Village. Refer to the previous section for details about destroying the equipment. Once it's destroyed, you'll get a call from your buddy telling you that he's found the medicine cache and he asks you to meet him there. Head to the small collection of buildings west of Outpost. As you close in you're likely to hear gunfire - help your buddy fight off the enemies and you'll complete the mission. Before you head off, make sure your buddy is ok. |
| Reward: | Reputation and a new buddy |
Addi doesn't have a mission for you, however the doorman outside the UFLL headquarters does. The APR is apparently holding some foreigner hostage at Sediko, and you think it's worth staging a rescue. This mission cannot be subverted, however it will net you a new buddy. I believe this mission is only available if you started the tutorial in an area controlled by the UFLL.| This mission is very simply. All you need to do is head to Sediko located at the northern region and eliminate all the enemies there. There are a total of about 8 or 9 of them, including a sniper positioned on one of the roofs. As long as you don't face all of them at once, dealing with the enemies here shouldn't pose too much of a problem; use buildings as cover, and try to remain in the outskirts of the area to avoid getting flanked. Once you've finished off them all, locate the building marked on your map; head inside and look for the ladder going up to the second floor. Climb it and open the locked door; inside you'll find and rescue a new buddy of yours. Once rescued, you should be able to find him (or her) inside the bar at the Marina. |
|
| Reward: | 30  and reputation; for the subverted mission you'll also gain buddy history and a safehouse upgrade (an explosives pile is added to your safehouses) and reputation; for the subverted mission you'll also gain buddy history and a safehouse upgrade (an explosives pile is added to your safehouses) |
A guy named Seth Uniya is apparently training mercenaries for the APR. As a former shop teacher, he's now teaching bomb assembly and disposal to the militia which could give the APR an advantage with their supply lines. Naturally, the UFLL wants you to take him out.| Your target for this mission is located at Polytechnic in the eastern region. If you drive to the safehouse just south-west of there, or if you travel by boat, you can find a small landing south of Polytechnic that'll provides an easy access point - and a useful one if you wish to enter by stealth. Uniya is located in a building at the north-western side of the area; as you approach you'll hear him talking on the phone. Getting there without being spotted is fairly easy, but entering the building is a bit more tricky. It may be alot simpler to just attack head on - or open fire once you're close to the building. I did the latter, and it worked pretty well since the building itself provided cover I could duck behind when I needed to heal up or reload. Once the passage is safe, enter the building and locate Uniya; don't stand around too long since he'll end up drawing a gun. Eliminate him and you'll complete the mission. |
Your buddy will meet you at the safehouse just south-west of Polytechnic. He wants you to fetch a binder from the border crossing of Sepoko at the north-eastern region. The binder contains maps of the cellular towers in the district. Since the teacher has connections within the supply line of the APR, you'll be able to convince him to send some new coordinates to one of their pilots thus luring him into delivering some supplies at a location you specify. Fetching the binder should be fairly trivial. At Sepoko you'll go up against the standard fare of enemies, although the area does have a sniper and an enemy carrying a rocket launcher there. The binder is located inside a building to the north.Once you've got it, head towards Polytechnic. Read the section above for some hints and tips for this area; however, be sure to convince Uniya to change the drop coordinates before you kill him. Once you're done, you'll get a call from your buddy. The plane is on it's way and he'll make another call once he's got the package. Soon after you'll hear (and see) a large plane soaring over the area to the south. Head towards the Airfield where you can find your buddy in a fire-fight with some militia; help him clean up the place. I personally didn't encounter any problems here - ony a few enemies remained, and my buddy seemed unscathed. If you're having problems, try using some heavier weapons if you have any; I used the MGL-140 which is quite effective as long as you know the location of your buddy (so you can avoid accidentally hitting him). Grenades should also prove useful in case you don't carry a grenade or rocket launcher. Once you've eliminated all the enemies you'll complete the mission. As always, make sure your buddy is still standing before you leave. |
| Reward: | 30  and reputation; for the subverted mission you'll also gain buddy history and a safehouse upgrade (Assault Truck with a mounted grenade launcher) and reputation; for the subverted mission you'll also gain buddy history and a safehouse upgrade (Assault Truck with a mounted grenade launcher) |
As you head up to Mbantuwe you'll hear him and Vorhees talking about how civilians apparently are turning their backs on the UFLL in favor of the Jackal. They have problems with an arms dealer, Yabek, that used to work with both factions; he's turned his focus on the APR and the UFLL can't live with that. Your mission is to take him out.| Yabek is located at a barge at Rail Xing in the eastern region. I would suggest that you follow the railroad tracks to that area; this will put you in a position high above the water (and the barge), which will provide an excellent sniping position, and allow you to take out enemies with rocket and/or grenade launchers without having to get in harms way; there is a heavy machinegun mounted on the barge which underlines the fact that staying at a distance is a good approach. The top of Rail Xing does have enemies around but since they include a sniper, taking them out just makes your objective that much more painless. Use the vantage point to take out as many enemies on (and around) the barge as possible; there is an enemy with a rocket launcher stationed on the rocks behind the barge - make sure you take him out, or at least be aware of him, since he can be a nasty surprise. Once you've considerably thinned out the enemies, head down towards the barge. Your target is located beneath the barge bridge inside a small room; I think you'll have to get close to the barge to be able to kill him (ie. I'm not sure it's possible from up above). He's armed with a rifle but he shouldn't pose any serious threat. Eliminate him and you'll complete the mission. |
Meet your buddy at the safehouse close to the southern border in the north-eastern region. He wants to help you take care of Yabek - with style. Yabek is not only helping the APR but he's supposedly also been spreading lies about your buddy, claiming that he works for the CIA. Your buddy's got a huge bomb that could prove useful, all it needs is a fuse. The bomb will allow you to blow up the bridge high above the barge, causing massive chunks of debree to fall... Head towards the Crash Site to the north-west. If you've been there before, you'll know that it's a pretty deserted area - sadly it isn't so anymore as it's been fortified by enemies. There are plenty around, including about three snipers. Approaching from the south you can move up between the rocks to gain a nice overview of the area; if you bring a sniper rifle or some heavy duty weapons you can deal with most of them from afar. Clear out the place and locate the "fuse" towards the center of the area; it's right next to the chopper wreckage, and it looks more like a warhead or something. Once you pick it up, you'll receive a call from your buddy who asks you to meet him at the bridge. | You'll meet your buddy on the bridge itself - simply follow the railroad tracks to get there. There are no enemies up there at Xing, so you don't really need to approach with caution. Move in on foot and give the fuse to your buddy; he'll arm the bomb and tell you to move away. Head west and get ready to fend off enemies; as you reach land, about six or seven enemies will appear and start shooting. Dealing with them shouldn't be too difficult since you'll have cover to duck behind, and you're likely to pack some decent weaponry. A couple of grenades can also prove quite useful. Once you've killed all the enemies you'll complete the mission. Just for good measure, check up on your buddy before you head off. |
|
| Reward: | 40  and reputation and reputation |
Here comes trouble. That's what you may be thinking as Mbantuwe tells you that him and Tambossa have talked, and with the suffering of the people weighing heavily on their minds - of course - they are negotiating peace. Mbantuwe is supposedly willing to accept Tambossas offer, and you're going to deliver that message to him in person. In return, Tambossa will give you some diamonds - as a sign of good faith - that you are to bring back to Mbantuwe. As you head down the stairs you'll meet your buddy inside the headquarters. This is getting more and more suspicious by the minute. He asks you to bring the diamonds to the Airfield instead; he's confident that this "truce" is nothing but trouble that'll end up getting you both killed. At the airfield, he's got a pilot who's willing to fly you out of the country, but he'll need the diamonds as payment.Ok, your first stop is at Sediko. The easiest way there is by following the road east out of Selao. Once you reach the village you're in for a bit of a surprise; a massacre seems to have taken place as you'll find the place on fire, and bodies scattered all over the area. This gets better and better by the minute. The objective marker points to a house on the southern side of the area; head in there and climb up the ladder. As you spot the body of Tambossa, your objetive will be updated. You need to grab the case of diamonds and get out of there - and keen to think that your buddy had a pretty good suggestion about the airfield. Grab the case...Ok, gotta admit I didn't see that one coming. As you grab the suitcase, you've suddenly got a machete by the throat. It's the Jackal - who seems to be a bit surprised to see it you who picked up the diamonds. He seems pretty convinced that this "peace agreement" was just a public stunt to remove the attention of the outside world, and that it won't really change anything; the factions will continue all their dirty work. The Jackal tells you that he's going to stop them. He kicks you in the face and you pass out. You'll wake up in a cellar at the Prison. Your weapons are gone. You'll hear your buddy - who's in another cell next door - talking to you, giving you a bit of insight into what has happened; you're being blamed with the assassination of Oliver Tambossa and foreigners such as your buddies has been rounded up and put in prison as well. You can soon spot two guards walking past the cell door towards the cell next to yours; the door opens and you'll start to hear loud cries of pain and some other disturbing noises; soon after the guards walk past again, this time dragging your buddy behind them.Look around the cell and you should spot a mis-colored portion on one of the walls - the same place where you could see your buddy peek through a small hole; "use" it to break it down, and you'll move through to a neighbouring cell, finding a machete and some malaria pills there. Head out and follow that passage up towards the prison proper; sneak out the front gate and head towards the objective marker just north-west of the Prison. There is a small camp just north of the Prison with some enemies near - if you're dying to get some weapons, you can try to ambush them; however, since you've only got your machete it might not be easy. You can use the Car as well, I guess, but I personally found it to make more enemies aware of your location. As you make your way past the objective marker you'll complete the mission. You'll also receive a call from Greaves asking you to meet him in Sefapane. Since you still don't have any weapons, besides a machete, I'd recommend you find a Weapons Shop as soon as possible. The closest one is located at at the bar to the west, in the south-eastern region.Please note that once you complete the mission you'll also get a note saying that new weapons have been unlocked. I am not sure if this is merely indicating that the Weapon Shops were locked when you were in prison, and that you can now access them again... I haven't confirmed this because when I last went through this mission, I had already unlocked all weapons; so if this actually does unlock weapons, feel free to drop me a line and let me know about the details. |
| Reward: | 25  and reputation; there is no additional reward for the subverted mission and reputation; there is no additional reward for the subverted mission |
In the office you'll meet Carbonell who is not too happy about Vorhees being in charge of the UFLL. In fact, Vorhees and Kangaras are out on a "fact-finding mission" at the mine; Carbonell thinks this is a perfect opportunity to take them both out, and he wants you to do it. This will effectively put him in charge of the UFLL. You can probably see where this is going - the leadership of both factions are dropping faster than flies.| Head down to the TaeMoCo Mine. I would recommend you move in from the east since that will give you a nice overview of the entire area; if you brought a scoped weapon, such as a sniper rifle or the MGL-140, you can easily pick off the majority of the enemies there. They're carrying standard weapons, so distance is definately an advantage here. Once you're done with them, move towards the building at the center of the area; as you approach, you can hear Vorhees and Kangaras talking. When you enter the building you have two choices - kill them both, or kill one of them and let the other offer to subvert the mission, asking you to kill Carbonell instead. The easiest path is obviously just to kill them both since, you know... they're right there in front of you. If you do, you'll complete the mission and receive a phone call from Reuben who asks you to meet him at the Marina bar; he warns you that some of your old "associates" are there, so you should use caution. |
I don't think it really matters who you kill - Vorhees or Kangaras; they'll both offer up the same subverted mission requiring you to eliminate Carbonell instead. They'll convince him to keep the window shutters open, allowing you to get a clean shot at Carbonell from outside the UFLL headquarters in Mosate Selao. Opposite of the headquarters you can find a blue building with a ladder going up to the roof; head up there to get a nice view of the area, and more importantly the upstairs of the UFLL headquarters. You should be able to spot Carbonell in there. If you have brought either a sniper rifle or a rocket or grenade launcher, he should be easy to pick off. Once you kill him, the entire town will be hunting for you - I believe there are probably about 20 enemies or so (or worse, they might actually respawn). Still, all you need to do is escape so you don't have to fight them all unless they really get in your way. The rooftop can be a good spot to deal with the majority since you'll have a good view of the area around you, and it's easy to back off the edge if you're getting too much heat.Once you've reached safety outside Selao you'll receive a phone call from Reuben; he asks you to meet him at the Marina bar, but warns you that some of your old "associates" are there, so you should use caution. When you're ready, head over to the next mission for the APR. |
| Reward: | 30  and reputation; for the subverted mission you'll also gain buddy history and a safehouse upgrade (an ammunition pile is added to your safehouses) and reputation; for the subverted mission you'll also gain buddy history and a safehouse upgrade (an ammunition pile is added to your safehouses) |
As you head up to the major, you'll hear them talking about The Jackal who's apparently begun to give away weapons for free. They suspect he's up to something but can't be bothered too much about it right now since they have more pressing problems. There is a serious shortage of morphine. This would initially sound bad, but as they explain, less morphone means fewer surgeries which again means fewer soldiers surviving. The UFLL has a supply of nitrous oxide (also known as "laughing gas") which is another form of anesthetic, and the APR wants you to destroy it. It's supposedly sitting in tanks on a flatbed truck, right out in the open.| The truck is located at the Dental Clinic in the western region. As you'd expect, there are plenty of enemies in the area, including a sniper, but for the most part they're standard fare. I found that using a sniper rifle was an excellent way to take out the majority from a distance, and then move in with a more close encounter type weapon (such as the Uzi) to mop up the remaining enemies. Since your task is to destroy the truck, I reckon that using more destructive weapons - such as the MGL-140 grenade launcher - might be a different but equally fun approach. The truck is located near the center of the Clinic; use a grenade, or similar, to destroy it and you'll complete the mission. |
You'll meet your buddy at the safehouse south-east of the Dental Clinic. He doesn't want you to blow up the truck at the Clinic - instead he wants you to pick up a distributor cap at the Post Office, go to the Dental Clinic, repair the truck and drive it to another location. Your buddy will leave his identity papers along with the truck and then set the nitrous oxide on fire. His old employers will think he died in the fire and hopefully forget all about him.You'll first need to pick up the "package" at the Post Office, just south-west of the safehouse. It's located inside the main building there. As always, there are plenty of enemies around - deal with all of them if you wish, just remember that all you need is the package. Once you have it, make your way to the Dental Clinic. Remember that you're here to steal the truck - so be careful using too heavy weapons or grenades around it, especially since such weapons can also cause fires which may end up damaging the truck. Deal with all the enemies here; once everyone is eliminated, locate the truck and repair it - stand in front of it and you should see the wrench icon. Once repaired, get into the truck and drive towards Sefapane to the north. This is fortunately not a long drive but the truck is rather slow, and you're more than likely going to drive through at least one checkpoint along the way. If possible and appropriate, run down enemies if you can - if they give chase in vehicles, get out and deal with them on foot. If you encounter a patrol along the way, your best bet is also to get out of the truck and take them out - especially if you're up against an Assault Truck since it'll just keep firing at you until the truck is too damaged to drive.At Sefapane your destination is at a garage at the UFLL headquarters there (where you met Vorhees). As you approach the door will open - drive in and park the truck. Your buddy will meet you there and he'll rig the fuse box. Go around the back of the truck and "use" one of the tanks - the use icon can be tricky to get to appear. Once done, follow your buddy out of the garage; stick with him and eventually the truck will explode which will get you the attention of everyone in town. Help your buddy deal with them - this part can be tricky since you'll have enemies coming from different directions, so deal with them as fast as possible to prevent them from shooting up your buddy. Once the area is clear, you should receive the Mission Complete notification, and the area is safe. As always, before you head off make sure your buddy is okay. |
| Reward: | 30  and reputation; for the subverted mission you'll also gain buddy history and a safehouse upgrade (assault trucks outside your safehouses will have a heavy machinegun mounted) and reputation; for the subverted mission you'll also gain buddy history and a safehouse upgrade (assault trucks outside your safehouses will have a heavy machinegun mounted) |
Once again you'll be greeted by eerie silence as you move up to receive your briefing. Silence hasn't been a good sign in the past. The APR wants to silence the propaganda being broadcast on radio by the UFLL. They haven't been able to locate their station because they've been moving around. However, the vehicle has been spotted over at Weelegol Village. You need to go there and destroy a generator which effectively will silence their broadcasts.| Your target is at Weelegol Village in the south-western region. There is a Bus Stop nearby if you wish to save some time. If you've been to Weelegol you'll know what awaits you - and probably which tactic works best. There are plenty of enemies there, and the architecture of the area ensures that it's less optimal to just rush in - especially because there's an enemy wielding a rocket launcher located further to the east. I suggest you stick to the outskirts of the area and take out enemies from afar; if you can take out the guy with the rocket launcher first, you've eliminated one of your main problems. Since the generator is located to the south of Weelegol there's really no other way to it other than through the village. I suppose you can try to sneak around (be sure to do this at night) and you can possibly avoid the enemies - I haven't tried it so I'm not sure how easy (or hard!) it will be. In any case, once you've cleared the path locate the generator. If you lack explosives or grenades, you can find some IEDs inside the house near the generator. Destroy it and you'll complete the mission. |
Meet your buddy at the safehouse located right in between the Ranger Station, Dental Clinic and Post Office in the western region. If you can bring an Assault Truck (preferrably with a heavy machinegun) it will prove useful later. He wants you to kill the Propaganda Minister, who is in control of the propaganda coming from the UFLL. He's got the power to shut down the broadcasts; by taking him out, the announcer on the radio will have a chance to read a special announcement regarding a certain foreigner in the country; hopefully it will cause a riot among the locals who'll be gunning for this foreigner. Sadly though, your buddy is the driver for him and is going to be in a vehicle with him when the riots start. He'll certainly need your help.The minister is staying at the tourist resort - the Ranger Station - to the south-west. There are plenty of enemies here, however things shouldn't be too difficult. There's a sniper positioned at the Station so keep your head down. Locate the minister inside a hut at the south-western part of the area; kill him and you'll get an update from your buddy - your next destination is at Weelegol where you'll have to "convince" the broadcaster - DJ Lord Haw-Haw - to put out the special announcement. I guess with a name like that, he's got it coming. If you brought an Assault Truck park it near the village so you can quickly get to it. Eliminate the enemies in the area and head to the DJ located at the hut to the south.He'll start his altered broadcast telling that there is a spy disguised as a health official in the country, there to poision the wells. Once he's done, head outside and destroy the radio antenna. Once done, use the nearby Jeep Liberty, or better yet the Assault Truck if you brought one. Drive through the village and head north towards the objective marker. Your buddy is at the checkpoint up ahead... if you're in a vehicle with a mounted gun, change position to it and let the vehicle roll into the checkpoint. Take down all the enemies there, just be careful not to hit your buddy. If everything goes according to plan he should make it out unscathed. Before you leave, though, make sure he's up and about. There's no sign of the foreigner that the riots are intended to take care of. |
| Reward: | 30  and reputation; for the subverted mission you'll also gain buddy history and a safehouse upgrade (a fuel pile can be found outside your safehouses) and reputation; for the subverted mission you'll also gain buddy history and a safehouse upgrade (a fuel pile can be found outside your safehouses) |
Mbantuwe is making alot of money by selling fresh water to a neighbouring country, and the APR are of course not too happy about it. They want you to destroy the pipeline. Although fresh water is a scarce resource, and it will cause alot of damage to the people, Tambossa is convinced it's for a greater good. Right. You'll have to obtain some TNT from the local mine and then blow up the pipeline. You can't subvert this mission right from the start - instead, you'll get a call from your buddy once you've picked up the TNT.| Your first stop is at the TaeMoCo Mine in the north-western region. The TNT is located in a building at the southern part of the area. As always, there are plenty of enemies there, including a sniper positioned at an observation post in close to the shack with the TNT in it. If you approach the area from the east, in between the two cliffs, you can find a good, elevated spot that gives a nice view of the major parts of the area. Take out the sniper and mop up the rest of the enemies. Locate and pick up the TNT. Your next destination is at M-S Pipeline in the southern region; I would recommend that you move to the observation post located just outside that area to the west. It provides a nice, elevated area that allows you to pick off enemies without having to worry about close encounters or getting flanked. There's a sniper at the observation post, but he should be easy pickings. He's likely to be wielding a SVD, so if you didn't bring a sniper rifle you can temporarily switch to his. Once you've dealt with all (or most) enemies slide down the side of the cliff into the dried out riverbed and from there up the path on the opposite side towards M-S Pipeline. You'll need to place the TNT at the pipeline marked on your map; approach it from the northern side and a "hand icon" should appear. Plant the explosives and move to a safe distance; the TNT will explode soon after and you'll complete the mission. |
Your buddy wants you to create even more havoc, and to do that you'll need to go blow up the automatic cutoff system at the reservoir pumphouse. This will ensure that once you blow up the pipeline, there won't be anything to cut off the water; the ensuing flood will effectively put the canyon - including the diamond mine - under water. There are supposedly no diamonds in the mine, and your buddy has been working there as security... now at risk of being fired, he's got no second thoughts about letting his employer drown. Your buddy will be at the mine when you blow up the equipment, so he asks you to come check on him. The pumphouse is located at the eastern side of M-S Pipeline Company, east of M-S Pipeline. You can destroy the pump by using explosives, a rocket launcher, or similar. I would recommend using either IEDs or grenades, since rockets have a habit of bouncing off the target. Once you destroy it, you'll get a call from your buddy - you now need to blow up the pipeline to the west. Follow the instructions for the Main Objective above if you need some tips. Once you destroy the pipeline, the nearby river will be filled with water and you can now travel that area by boat. Shortly after you'll get another call from your buddy; he's at the mine and he needs your help. As you'll see when your reach the mine, the whole area has been flooded; it's not entirely under water, but navigation in the area is a bit more tricky since you wont always have solid ground under your feet. There are plenty of enemies around, and your buddy is severely outnumbered. Take down the enemies as fast as possible, but avoid grenades and rockets since your buddy is likely to be around the center of the area along with most, if not all, of the enemies. Even after a couple of attempts, I couldn't prevent them from severely injuring my buddy - I managed to heal him after the battle, but trying different approaches just couldn't prevent him going down. I recon you're in for a similar ride. Kill all the enemies and the mission will be completed. Before you head off, make sure you check up on your buddy. |
| Reward: | 40  and reputation and reputation |
Now that Tambossa is dead, Greaves is eager to take over the operations of the APR - and the UFLL for that matter. There's one obstacle left, though, seeing that Addi Mbantuwe is still alive. Your tasked with eliminating him.| Mbantuwe is hiding out at the brewery at the southern region. Although not the quickest way there, travelling by boat is pretty convenient - you can find a Swamp Boat at the south-western corner of Sefapane; another option is driving to the Bus Stop and quick travelling to the south-eastern region and moving from there to the brewery. Not surprisingly, there are plenty of enemies at the Brewery, and there's also an enemy stationed at the small island just north-east of the area; he's armed with a mortar, and he can be really annoying. Fortunately, I don't think he's got an endless supply of mortar rounds - still, you gotta watch your back when he's firing at you. The rest of the enemies are pretty much like you're used to - armed with assault rifles and shotguns.Fighting them can be a bit tricky if you're caught in the open; I would suggest that you take out as many as you can from a distance before you move in, especially if you've been spotted by the enemy with the mortar. When he shoots at you, you'll have to move quickly to avoid getting hit by the blast; if you have to worry about that - and enemies around you - you can easily find yourself in a tight spot. Another approach which may work better is to head into the large building as quickly as you can - you'll have protection from mortar rounds, and you don't have to worry about getting flanked by enemies. Once you've dealt with the enemies, move into the large building in the south-western part of the area; Mbantuwe can be found in a room on the second floor. He's not too happy to see you which, I guess, is understandable. He rambles on about how he basically owns the country; I'm sure Greaves would disagree. Anways, finish him off and you'll complete the mission. |
|
| Reward: | 25  and reputation; there is no additional reward for the subverted mission and reputation; there is no additional reward for the subverted mission |
| At the Marina bar you can find both Purefoy and Reuben Oluwagembi there. Talk to Reuben and you'll learn that there's been a massive shoot-out at the airfield. Things are going bad, fast. Reuben has hired some mercenaries from the APR to take him there so he can get a glimpse of what happened - at least that's what he hopes; he can't be sure, and he suspects that they might just take him away and kill him. Just in case, he asks you to back him up - if he gives you a call, be ready to come to his rescue. Once you've talked to Reuben head over and talk to Purefoy. He knows you've been doing the dirty work for the UFLL, but rather than being upset he's actually inspired by it - especially your latest deeds where you did some extreme "housecleaning". Purefoy wants you to take out Greaves and Quiepo. |
| Your two targets - Greaves and Quiepo - can be found at Sepoko in the north-eastern region. As you're probably accustomed to by now, the place is inhabited by a number of enemies. Although there's not that many, you'll find both a sniper and an enemy with a rocket launcher here. If you use the good, old "distance approach" by using a sniper rifle or perhaps a MGL-140, you can deal with most of them from safety. Once the area is clear, head into the building marked by the objective. You'll find Greaves and Quiepo inside. Now you've got the same basic options as with the last mission - you can either kill both of them and finish the mission, or you can kill one of them and take up the offer of subverting the mission, which esentially means that you'll have to kill Purefoy instead. As you complete the mission you'll get yet another call from Reuben Oluwagembi - he's at the Airfield where militia have rounded up all journalists; he's not sure what will happen - perhaps they'll just be deported, or perhaps the militia will just take care of them in their own way. |
You can find Purefoy inside the headquarters at Mosate Selao. You'll have to go past the guard at the door, but since he's been bribed by the lieutenant you didn't kill, he will let you pass without taking your weapons. Head up the stairs and confront Purefoy. At least he doesn't seem to suffer from grandeur - or at least he just doesn't say much. Kill him. You'll complete the mission and get the phone call from Reuben. As with the previous, subverted mission, you'll get the entire town on your back. This can be slightly tricky, depending on how lucky you are; you cannot fight from within the headquarters, so you'll have to get outside where you'll be alot more exposed. Still, remember that all you need to do is escape; pick fights if you like, otherwise just focus on getting out of the area alive. |
| You'll need to head over to Reuben who's at the Airfield. As he explained on the phone, all journalists have been rounded up there and they're about to be deported - or worse.There's some seven or eight enemies at the Airfield. Since your reputation at this point is quite high, you're probably going up against a sniper, an enemy with a rocket launcher, and an enemy with a mortar. I found that using a sniper rifle (again!) worked perfectly as I could take them out before they even noticed me. Once you've dealt with them, you can put your attention on the remaining enemies. Once done, head over to the large hangar and enter the door on the southern side. Inside you'll find Reuben along with a number of civilians. He's got some important information; the factions have joined forced and as their first order of business they've decided to deal with a civilian uprising at the old Prison; Reuben Oluwagembi believes The Jackal is behind it and that he can be found there as well. |
| This mission is the final mission in the game and it includes a point of no return - this means that if you have any unfinished business, you've got to take care of it before heading to the Prison. A lengthy mission is ahead, and I would recommend that you spend diamonds on first aid kits along with upgrades for all the weapons you intend to bring. Also be sure - if you haven't already - to buy the three safehouse weapon crates. You'll get access to some safehouses in this mission, and being able to retrieve some fresh weapons there can be a good help. Stash away some weapons at the crates at the Weapons Shop. I recommend that you bring some diverse weapons for this mission; I personally went for the M-79 Grenade Launcher since it has a good range and a nice area of effect; I also brought the AS50 to deal with enemies from a distance; finally, the M-249 SAW (packing a total of 500 rounds if you buy the upgrade) means that you're not likely to run out of ammunition and you've got a good weapon for close encounters. Your mileage may vary, but the main point is to bring some diverse weapons that are useful for different situations. You can also stash away some different weapons (from the ones you bring yourself), so if your current loadout proves lacking you'll have some alternate weapons waiting for you. |
Head over to the Prison where you can find The Jackal at the courtyard. He explains that he wants to help civilians get out of the country; they've already headed towards the border. Sadly, a rival arms dealer has stolen the Jackals diamonds, which he needs to bribe the border guards. You'll need to get that briefcase back. Second, the new warlords in charge of the APR and UFLL are having a meeting, where they're trying to figure out how to deal with you and the civilians; since you basically put them in their respective positions, you've got the responsibility to deal with them as well. Follow the Jackal over to the gate at the opposite side of the Prison. Once you've heard what he has to say, head out the gate towards the east. As you head out of the gate, you'll complete the mission and receive a new one reflecting the two goals outlined by the Jackal.Continue east and eventually you'll get a notice saying that the area ahead is rough and that if you continue, you won't be able to return. Since you should already have taken care of any unfinished business you can simply ignore the notice and continue; however, if you still have some things to take care of in Bowa Seko, now is the time to turn around and deal with them. Once you're ready, continue east and you'll eventually reach an area named Heart of Darkness; there are a number of enemies here. I guess you can try to sneak around, but dealing with them shouldn't prove too difficult... just be aware that there's a mounted grenade launcher on the northern side of the area; if an enemy uses that he can take you out in a matter of seconds if you're caught in the open. As you approach from the west, you can find a large rock that gives you a nice overview of the area - and it also serves as a good spot to attack the enemies below; a grenade or two can be quite useful here. You can find an ammunition pile at the center of the area, and a health cabinet to the south. Once you've cleared the area, continue towards the east.You'll soon come upon a safehouse near a shallow stream. All the safehouses in this area are not regular safehouses as they do not have any of the rewards you may have gained from subverting missions. Still, you'll often find some basic equipment inside. The safehouse in this particular place has an ammunition pile, health supplies and a couple of water bottles inside. Pick up anything you need and head towards the south. You should soon be able to spot a patrol near the road; it consists of about three enemies so dealing with them shouldn't be a problem. Once they're dead, continue south (or make a quick detour back to the safehouse if you need ammo and/or health). On the western side of the stream you should be able to spot a small hut; there are some explosives here in case you need any. Following the stream east you'll soon see a tree that's fallen to the south, and is now resting on some rocks. You can climb the tree and find a golden AK-47 up there; I'm not sure if it's going to be of any use as you've probably brought superior weapons.You'll eventually reach the Swamp - another named area with enemies in it. A sniper rifle will serve you well here, as you can pick off basically all the enemies from a safe distance. There is a small path on the western side leading up to a small raised area - this is a good place to deal with the enemies since you've got a nice view of almost the entire area. On the north-eastern side, where the stream ends, you can find another stationary grenade launcher, along with an ammunition pile and some health supplies. Once the area is clear, stock up on ammo and health, and continue to the north-east.You'll come upon some large rocks forming a small gorge with a path running down below. You can also spot a safehouse on the other side. There are about three enemies near the path, so deal with them before you continue. Move to the north, then follow the path into the gorge; you'll eventually come to a plane wreck where you can find some ammunition and health supplies. The path leads up on the western side - up there you can find a large rock going all the way across the gorge, with the safehouse just ahead. The safehouse has an ammunition pile inside, a health cabinet, along with weapon crates inside; if you've brought some weapons that didn't work out - or if you just need a replacement - this is a chance to exchange weapons. Once you've geared up, head out and follow the path to the south-east. You'll come upon a fuel pile along the way. Before you reach the Landing Zone, make sure you save your game - a tough fight awaits.| As you'll notice as you approach the central part of the Landing Zone, it's surrounded by a fence. There's a small part of it which allows you to climb over. As you do, you'll notice one of your buddies there. If you approach, you'll soon learn that many of your buddies are there, and they're not willing to share the loot with you. You'll have to fight them; however, they won't attack immediately - stay on your toes and be ready for a battle. Since the area is fenced in, it's hard to make an all out retreat - and the fact that they're not exactly pushovers - and there's about 6 of them, all gunning for you - makes the battle alot more difficult than what you're used to. One tactic is to take down the first buddy from outside the fence - as he or she is down, move in and pick up the briefcase. This will make the other buddies come out of hiding and attack you; retreat to the small hut to the north-west and use it for cover. Give them all you got - I found that switching between a grenade launcher and a machinegun worked quite well; use the grenade launcher for targets at a distance; a sniper rifle can also be quite effective. Once you've dealt with all your former friends, search the place for ammunition and health supplies; you can find an ammunition, fuel and explosives pile on the northern side of the Landing Zone; you can also find a health cabinet at a hut to the south. Once you've replenished your supplies, backtrack towards the safehouse to the west and beyond it towards the Jungle Bivouac to the north. You'll pass an explosives pile along the way, in case you need more munitions. Before you reach the Bivouac, save your game again for good measure. |
| This is a cease-fire zone, so you'll automatically lower your weapon as you enter the area. This also means that you don't have to worry about enemies until you open fire. Head over to the hut indicated by the objective marker - inside you'll find the two faction leaders. As you approach, you can hear them talking about plans to sweep the area, possibly to round up (or kill) all the civilians in the area. Since you have to kill them - and since the area is swarming with enemies, I'd suggest you put a bit of distance between you and them. I found that moving across the bridge to the southern part and lobbing a couple of grenades into the hut worked like a charm - but I guess it depends on where you find the bulk of the enemies; locate an isolated spot so you don't immediately get shot to pieces. Once you've killed the faction leaders, focus on getting out of the area - either to the east or to the west. Pick fights only if you must. Once you've got the diamonds and dealt with the faction leaders, your next stop is at the Jackals hut to the north-east. East of the Bivouac you'll come upon an open area with some enemies in it; there are only four or five of them, so they shouldn't be a major problem. Deal with them and move on. Eventually you'll locate the Jackals hut. |
| Head inside where you'll find the Jackal. As you've come to learn, he's trying to help the civilians get out of the country. He's got a plan, but it requires two men. One of you has to go blow up a ridge that will cause debris to block the path, meaning that the faction militia wont be able to reach the refugees. Sadly, the detonation cord is busted, so you'll have to short circuit the blasting caps using a car battery; this is a manual process so you'll be right by the dynamite when it goes off - I reckon the chances of survival are pretty slim. The other one has to go to the border and bribe the guards there so they'll allow the civilians to cross; I'm not sure I follow the logic, but once you've done that, you'll have to commit suicide - possibly to prevent the militia from ever getting their hands on you. Once the Jackal has explained the options, it's your turn to choose - pick up the battery if you want the exciting task of blocking the path for the militia, or you can pick up the briefcase if you'd rather go to the border crossing instead. Your choice only makes a minor difference, actually. While the two tasks are slightly different, the end result is the same. Before you choose, make sure to save your game in case you wish to go back and explore the other route. |
Head out of the hut and head up the path to the west. Near a fallen tree you'll encounter some enemies; deal with them and head on. The detonation cord is busted, so you'll have to short curcuit the blasting caps using the battery. Eventually you'll find the dynamite. Use it and you'll prepare for the blast. Use it again and you'll be treated to the ending cutscene of the game.Head out and follow the path to the north. Continue north and you'll eventually come to a border outpost with a house nearby. Head inside and find one of the guards there. Talk to him and you'll bribe him (and his fellow guards) to let the civilians pass. The ending cutscene will follow. |
|
 If this is the first time you play the game, I'd suggest that you explore a bit, and perhaps move outside in the streets to get your first feeling for using guns in the game. As stated, though, you'll eventually go down one way or the other.







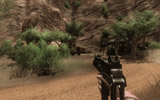


 - @dawnrazor73