|
This page provides a walkthrough of all the assassination missions available in Far Cry 2.
External parties have taken an interest in the affairs of the country, and they are more than happy to have you eliminate targets of opportunity. If you seek out information on the targets, you can take those opportunities in return for diamond payouts. Each mission has the same, basic briefing, given to you by a concealed voice.
Assassination Mission are random in the sense that when you pick up a mission it'll be randomly selected among a predefined number of missions. For example, if you start a new game and pick up the first Assassination Mission it may be different from the first mission you got in a previous game. While you're in the beginning district of Leboa-Sako, you'll only be able to pick up the first six assassination missions; these will net you 10 diamonds for each mission, providing a total of 60 diamonds for all the missions. Another six missions awaits you in Bowa Seko, supplying you with another 90 diamonds - 15 for each one. Completing all assassinations mission will thus earn you a total of 150 diamonds.
| Reward: | 10  |
The target for this mission is located at the Mokuba shantytown in the south-eastern region of Leboa-Sako. This area has alot of militia in it, including one armed with a RPG-7 Rocket Launcher stationed on the northern side. The sheer number of enemies alone makes it difficult to make an all-out stealthy approach - still, thinning out the numbers using stealth can still be an excellent approach.The target should be located just off the center of Mokuba - however, if you're spotted by militia he may start to move about. He should be marked on your map so even if he does move, he should be fairly easy to locate. The target is only armed with a pistol so if you're faced with him directly, he shouldn't pose too much of a problem. |
| Reward: | 10  |
Your target for this mission can be found in Pala in the central region of Leboa-Sako. It should be quite trivial to find and kill him, but there is a catch.Pala is a cease-fire zone, and the local militia won't be too happy about you gunning up the place. Don't worry too much about it, though; once you've eliminated your target, you will be given an update to the mission requiring you to escape the town and any pursuers. Once you do escape, there will be no hard feelings - ie. you can safely return to Pala at any time without fear of reprissals. Sadly though, the town will be alerted no matter how you kill him, even silenced weapons will set them off. After that, an on-screen message will tell you to escape; once you're far enough away from the town the message will disappear and you're off the hook. |
| Reward: | 10  |
Your objective is located inside the large hangar at the Airfield in the southern region of Leboa-Sako. The area does have about six or seven militia around, including a sniper stationed at an observation post at the eastern side of the Airfield. The target is armed with a pistol, so he's obviously not going to be your primary threat as such. One neat approach to this mission is to bring a sniper rifle and take out the sniper; take his position and use it against the enemies at the Airfield proper. Once you've eliminated the majority of your opposition you can move in and finish the job. |
| Reward: | 10  |
This mission will take you to Shwasana, the large collection of buildings built above the water in the northern region in Leboa-Sako. Your target is initially located inside one of the central buildings. The area has alot of enemies around which means that if you pile straight in, you can easily get surrounded in a fire-fight. As with the previous missions, a good approach is to either stealth your way as far as possible, or take up a sniper position in a safe place and take out as many as possible. You can also use brute force by bringing eg. a RPG-7 Rocket Launcher and/or M-79 Grenade Launcher; this can be quite fun seeing as you sometimes can take out alot of enemies with one shot and then watch them fly about. The target himself is once again only carrying a pistol, so he should be the least of your concerns. |
| Reward: | 10  |
This time you're faced with a moving target who's initially driving around south of the Airfield in the southern region. The target is sitting in the passenger seet of a Jeep Wrangler, and he's escorted by two fully manned Assault Trucks. Once you've been spotted (or perhaps just get close enough) they'll start moving around the Airfield in a large circle. Observing their pattern should allow you to find a good sniping spot and take them all out from a distance. You can also apply more brawn if you choose. In any case, it should be a fairly trivial affair to eliminate them all, especially since they'll repeat the driving pattern even if you start to attack them. Please note that if you eliminate the driver of the Wrangler, the target is likely to get out and try to run away (or fight) on foot - which may make things a bit easier. |
| Reward: | 10  |
This mission will require that you make another trip to Pala. The target is located in the south-western side of the town. As with mission #2, you'll get the whole town on your back once you kill him - even if it's silently. Escaping should be fairly easy, though - there is a hole in the southern fence just east of the target; from there you can get in the nearby car (at the Bus Stop) or simply try to run away. You're likely to come under fire, but if you have a vehicle handy you can make a quick escape. |
| Reward: | 15  |
Your target is located at the eastern checkpoint in the central region of Bowa Seko. If you go there by land it should be fairly easy to sneak up on him; there's plenty of tall grass around the area that you can hide in. You can approach by water, but there's a house by the river which has enemies around it so you're likely to be spotted if you do. A grenade launcher or a sniper rifle will get you an easy kill but with any approach you're likely to attract the attention of nearby enemies. |
| Reward: | 15  |
Your target is located at Mosate Selao in the central region; he is walking around the UFLL headquarters. This is a cease-fire zone. As with previous missions like this, the target is pretty easy to eliminate - it's the part that follows that can be tricky. If you bring a long-range weapon such as a sniper rifle - or any rifle, really - you can take the target out from a distance, which should make the escape alot easier. Once you eliminate the target, you'll have basically the whole town on your back. Make your way to safety, which shouldn't be too difficult. |
| Reward: | 15  |
This mission is basically exactly the same as the previous one - ie. your target is located at the center of Mosate Selao; this time though he appears to walking around the APR HQ which, obviously, makes it alot more difficult. Nah, just kidding. If you completed the last mission without any major incidents I suggest you use exactly the same approach for this one. |
| Reward: | 15  |
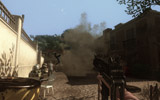
Now this is more like it. This mission takes you to Dogon Village in the northern region. If you've been there before you know that it not only has alot of enemies in it, and one of them is carrying a Type 63 Mortar; he's located on a roof which also means that he's quick to spot you. He'll use a tracer round before an explosive shell, so if you spot yellow smoke nearby make sure you sprint away since a shell is inbound shortly. Your target is located initially on the northern side of the village proper; he's only armed with a pistol and thus probably won't be your primary concern. However, remember that all you need to do is kill him to complete the mission - so once he's dead feel free to make an all out retreat. This also means that you can focus solely on him and only deal with enemies who come directly in your way. Whichever approach you take, it shouldn't be overly difficult. The village is dense with buildings which means that if you get into a firefight here - which is highly likely - a good short-range weapon will serve you well. |
| Reward: | 15  |
In this mission you'll once again be taking down a target inside a cease-fire zone, however this time in Sefapane in the north-western region. This should be familiar territory - both the mission and the area it takes place in. I actually threw a grenade at him the first time I did this mission... it killed him, but surprisingly no-one got mad. The second time, though, I wasn't as lucky and got the town on my back as you'd expect. |
| Reward: | 15  |
Finally, a moving target! He's driving a Jeep Liberty and is being escorted by two fully manned assault trucks. They are driving around the center of the north-eastern region. Their route takes them around on the central road, ie. past the Weapons Shop, south towards the Crash Site, south-east, north-east, and then back towards the Bus Stop. If you've tried some of the Convoy Missions, you'll know that a rocket launcher, grenade launcher or some IEDs will make them an easy target.This mission concludes the assassination missions in the game. I personally wish they'd made more of them - or at least more varied since the potential allows for alot more than what's actually there. Still, though, I guess it's definately better than nothing. |
|


 - @dawnrazor73