This page tries to explain various game mechanics that are dominant in Far Cry 2. If you've played the game before, or if you're a seasoned gamer, most of the information here should be somewhat trivial; still, I hope that you might find some of it useful.
|
In the menu, in the PC version of the game, you can find an item called Additional Content. If you click on it, you'll enter another menu with just one option: Promotional Content. Click that and you'll be prompted to enter a password. If you enter a correct password, you'll unlock a number of additional missions in the game. These missions all deal with a predecessor of yours who were also sent to kill the Jackal.
To unlock the extra missions enter one of the following passwords. I believe they all unlock the same missions, so there is no need to enter more than one - and it shouldn't matter which one you enter. Just notice that the passwords are case-sensitive, so type them in exactly as they appear below; I've included more than just one password since I haven't confirmed if there is any difference between the content they unlock - but as far as I've seen (and heard), there doesn't seem to be.
- THaCupR4
- 2Eprunef
- 6aPHuswe
- 96CesuHu
- Cr34ufrE
- JeM8SpaW
- sa7eSUPR
- SpujeN7x
- tar3QuzU
- tr99pUkA
- zUmU6Rup
After you start a new game you will eventually receive a phone call - about an hour (real time) into the game or so; the first time I got it, I was still hunting down diamonds and unlocking safehouses in the central area. A masked voice informs you that you're not the first one who's been sent here on a mission to eliminate the Jackal. While your predecessor went silent and is presumed dead, his informants are still dropping messages for him which can potentially compromise your mission. You need to intercept the messages and silence his informants. For a walkthrough of the missions unlocked by this feature, please refer to the Extra Missions page.
|
| Buddies are the closest thing you'll come to friends in Far Cry 2. They're solitary mercenaries who are not affiliated with either the UFLL or the APR, and generally speaking if you help them out, they'll help you out. While playing through the tutorial section of the game you'll rescue your first buddy. You'll also be given another buddy automatically upon completion. Later on in the game you may locate and rescue other buddies, as part of your exploration or as part of the primary missions in the game.
Rescuing a buddy is usually quite simple. Most of them will locked up in various buildings throughout the world - all you need to do is unlock the door and you've got a new buddy. You may also gain buddies in a few other situations, although these are quite rare. Also, you may also gain a new buddy as a direct, or indirect, consequence of completing a primary mission.
Each buddy in the game has two buddy missions to offer. They're sequential, so you'll have to complete the first one to gain access to the second one. You can meet your buddies at the local bar (Mike's Bar in Leboa-Sako, or at the Marina in Bowa Seko); approach a buddy and you can initiate a mission. They'll ask you to help them with various situations - sometimes it's a personal matter and other times it's more of an idealistic one. Refer to the Buddy Missions page for a list of available buddy missions. You can only pick up a buddy mission every other general mission; this means that if you pick up a buddy mission and complete it, you'll have to do a different type of mission (ie. Assassination, Convoy, Underground or Primary mission) before another buddy mission is available.
When you accept primary missions you'll often get a chance to subvert them. This means that one of your buddies will offer an alternate approach to the mission and he will also get personally involved. While this means that you'll get a larger reward from completing the mission, it also means that your buddy will literally put himself in harms way. This often means that you'll have to help your buddy at the end of a mission. During this part of a mission your buddy may get mortally wounded, requiring you to heal him; your buddy can also die - either directly from enemy fire, or if he requests you to mercy kill him with either an overdose of painkillers or - if you're short on syrettes - a bullet from a gun.
Most often after you've picked up a primary mission you'll get a call from your best buddy; he'll ask you to meet him at a safehouse somewhere in the district, usually fairly close to the mission objective. If you meet up with him there, he'll offer the subverted mission.
Completing a buddy mission will increase your history with the respective buddy and increase your reputation. The history with your buddies will determine which buddies will aid you; the buddy with the highest history. As mentioned above under Reputation, I personally find only little incentive to actually complete buddy missions - especially if your hell bent on keeping all your buddies alive; in this case there's no reason to increase their history, and you'll only get reputation out of it which just means that enemies in the game will become tougher foes.
Your two best buddies will help you in different ways. As mentioned above, your best buddy will help you subvert primary missions. Your second best buddy will provide rescues in case you're wounded; if you take enough damage so that you pass out (ie. by being shot, drowning, or getting run over by a car) a buddy will usually come to your rescue; this is an elaborate sequence where your buddy will help you to your feet, drag you off to safety, and fight off any nearby enemies. When you're "resurrected" this way, you'll regain two health bars; the buddy will stick around to make sure you're safe - however, if you go down again, the game will end. When you reach Bowa Seko you wont initially have a rescue buddy; during the mission that takes you to Bowa Seko you'll eventually meet a buddy at the clinic in Mosate Selao (this seems always to be Nasreen Davar). You'll need to "unlock" her as your rescue buddy, and to do so you must find and talk to her in one of the safehouses around the district. It appears that this safehouse is randomly chosen, so you may have to explore a few before you meet her. Until you've unlocked her, there won't be any rescues available if you go down eg. during a firefight, and the game will end in these cases.
|
|
You'll find checkpoints scattered throughout every district and most of their regions in the game. There are three things you'll always find at a checkpoint: enemies, supplies and vehicles. The number of enemies (and their equipment) often vary; enemies in Leboa-Sako tend to have only basic weapons such as assault rifles, pistols and grenades. In Bowa Seko you'll start to encounter more heavily armed enemies carrying more powerful sniper rifles and rocket launchers; the weapons carried by enemies are also decided by your reputation - a higher reputation means that enemies will carry better and more lethal weapons.
Each checkpoint has either a ammunition pile, fuel pile, explosives pile or a health cabinet. By tagging these with your monocular (or simply by approaching the pile or cabinet) you can scout a checkpoint; this will basically replace the "locked checkpoint" icon on your map with an icon indicating which type of checkpoint it is, ie. what kind of pile (or health cabinet) you'll find there. You can also find other types of supplies at checkpoints, but only in limited amounts. Checkpoints also have vehicles available - the most common being assault trucks (and swamp boats if the checkpoint is close to the water).
Since checkpoints features both enemies and vehicles, you'll often find yourself being pursued if you just drive through (or near) a checkpoint; if you can get enough distance between you and them, they'll often give up the chase, but most times the enemies will be quite fast getting into a vehicle. This can be quite annoying especially since there are so many checkpoint scattered around the two regions; often you may wish to completely avoid checkpoints just to make sure you don't end up in yet another firefight (or being chased by an Assault Truck).
|
|
Diamonds is the only currency in the game. You can use diamonds to buy new weapons and equipment at the Weapons Shop. You can earn diamonds in a couple of ways:
Completing both Primary Missions and Assassination Missions will earn you diamonds. Assassination Missions are optional missions that require you to eliminate various "targets of opportunity". Primary Missions will move the story forward in the game, and as such they are not the most convenient way to earn diamonds - at least not if you wish to earn diamonds without any real consequences. Another option is to locate some of the numerous diamond briefcases that are scattered all over the two districts.
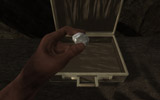
As you explore the vast lands you'll often come upon diamond briefcases. While they only contain a small amount of diamonds (one to three diamonds per case), the sheer number of briefcases available means that you can gather quite a nice amount. There are 221 briefcases in the game, containing a total of 409 diamonds.
Most of the briefcases can be found out in the open lands which means that all you have to do is invest some time in locating and looting them. However, some briefcases are also located in many of the named areas in the two districts. Since these areas are inhabited by enemies, locating the briefcases here does come with a small risk.
You can see the locations of all diamond briefcases in the maps contained in this site. You can also use the interactive maps to see the location and read a description of how to locate each individual briefcase; some briefcases are more tricky to obtain - or require a certain approach - and I've tried to include such information in the descriptions as well. If you have problems using the Interactive maps, or you just dont like them  , I've also compiled standard lists that can be found in the Diamonds section of this website. , I've also compiled standard lists that can be found in the Diamonds section of this website.
|
| There are four difficulty levels in Far Cry 2: Easy, Normal, Hardcore and Infamous. While they don't affect any missions or objectives, there is noticeable difference between them. The most obvious one is how much damage you take from enemies; at Normal difficulty you can easily soak up alot of bullets, and if you're a seasoned gamer this difficulty will probably be too easy. At Hardcore difficulty, your health will drop much faster - seasoned gamers should find this more challenging and satisfying to play. The difficulty level also affects how much ammunition and how many syrettes you can carry. At Normal difficulty you can carry 5 syrettes (without any of the First Aid Kit upgrades), for example, while at Hardcore difficulty this is reduced to 4 syrettes. Health Supplies will also provide fewer syrettes (actually only a single one) on the difficulty levels above Normal.
|
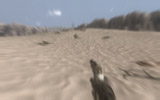
| While Far Cry 2 does feature two huge districts that are pretty much open to exploration any way you see fit, it's still just a game - ie. the world is limited. Around the border regions you'll find vast deserts. If you venture too far off, the screen will start to blur and your vision will be impaired. This is a warning signal indicating that you're moving too far off; if you don't turn around, you will eventually pass out. This isn't dangerous since you'll just wake up a bit further back the way you came. The only thing you really need to know is that if you drive too far off, and pass out, you'll still awake further back, but your vehicle will stay in the place where you passed out - ie. you're likely to lose your vehicle since you can't really go back after it. Although it's never nice to feel limitations in the game (even if they are fair), it's nice to see a new approach to keeping you inside the area the developers meant for you to play in instead of just bumping into hidden walls.
When you start a new game you won't have access to Bowa Seko straight away. Although the Central Desert does connect the two districts, you'll pass out if you move too far into this particular area. I suggest you only explore that region once you're meant to, ie. when the story leads you to Bowa Seko. If you really need diamonds, the two briefcases in the northern part should be safe to claim without worrying about passing out.
Sadly, you cannot explore every little nook and cranny of all the regions. In certain areas, especially around cliffs and mountains, you may actually bump into invisible walls that keep you from going any further. While this is pretty rare, it's still a bit sad because it would be nice to be able to explore all areas, and it does take you out of the experience and remind you that this is just a game. Still, with the amount of land in the game, there are plenty of other places to explore.
While some may find exploration exciting in itself, the game does have a few incentives for you to venture off on your own. Throughout the lands you may come upon plenty of diamond briefcases, and there are also Jackal Tapes to be found. You may also come upon some interesting sights such as crashed airplanes, makeshift shelters,
|
| In Far Cry 2 you can get injured in a number of different ways. The most obvious one is, of course, being shot, but you can also get wounded by falling, staying underwater for too long, or by being burnt. Your injuries are directly reflected upon your health bar; this is made up of five smaller bars. If you're wounded eg. by being shot, and your health drops to 3.5 bars, if you wait a bit (and don't get injured further in the meantime) it will eventually automatically heal up to the next full bar - in this case the fourth one. So basically you have five "health points" where injuries doesn't necessarily take away a full bar at a time.
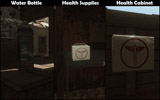
Syrettes allow you to heal any wounds you have sustained. You can replenish your syrettes by picking up health supplies or looting health cabinets; doing this will also heal any wounds you have. Water bottles will also heal any injuries but doesn't provide any syrettes. At the Weapons Shop you can buy First Aid Kit upgrades that allow you to carry an additional syrette or two. A health cabinet will completely replenish all your syrettes; health supplies will provide one or two syrettes depending on the difficulty setting of your game.
If you are down to your last health bar, you're mortally wounded. When this happens you'll need immediate medical attention and your health will slowly deplete until the wound is patched up; although your health will "bleed" at this point, I don't believe you can actually die from just that - however, at this point you barely need another scratch before you go down.
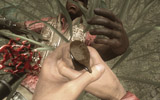
When you press the Self-Heal button, you wont actually use a syrette, but rather perform an elaborate emergency treatment (such as bandaging your wounds, or pulling a bullet out of your arm or leg with a pair of tongs) - this will restore your health back to two bars. This move takes a bit of time, and what's worse: it can be interrupted - if you get shot, for example, you'll stop the treatment and will have to try again. This can be very dangerous since a mortal wound will cause you to bleed health, and at the same time you're vulnerable because the healing process can be interrupted. If you're mortally wounded with enemies around you, your best bet is likely to find a cover spot (behind a car or a rock, for example) where you can heal without as much danger of being interrupted. Another option is to try to take out any nearby enemies before healing yourself, but since you're already very low on health this can be a risky move.
|
| Reuben Oluwagembi is a journalist covering the conflict between the APR and UFLL. As a seasoned reporter he's even had the opportunity to interview The Jackal, but sadly most of his interviews have been lost; however a few remain, and these so-called Jackal Tapes, can now be found scattered across the land. Although Reuben cannot provide any material reward for returning these tapes, he will offer his friendship and humble thanks.
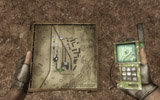
When you pick up a Jackal Tape you'll get to hear the content, which often provide some insight into the who the Jackal is and what motivates him. You can see a list of all the Jackal Tapes you've found in the menu, as well as replay them if needed. As with diamond briefcases, you can use your GPS to locate Jackal Tapes. The indicator will start to blink when you're close to a tape. You can find a Jackal Tape in each of the following regions (click a link to see the exact location of the Jackal Tape in that particular region):
|
| During the introduction sequence it will become apparent that you suffer from malaria. While this isn't going to have a major impact on the game as such, it's still something you'll need to deal with. As far as I know, the malaria will not kill you but keeping it at bay does come with a few positive side-effects. Every now and then you'll suffer a malaria attack; as you saw during the introduction, this will cause your vision to blur, and your stamina will temporarily be drained leaving you unable to sprint or jump. A pill bottle icon will appear in the lower, left corner of the screen. Use the Self-Heal button to take a pill, which will remove the symptoms of malaria for a period of time. While these symptoms for the most part are simply an annoyance, suffering an attack while in combat can be potentially disastrous.
If you go to the Journal page in the menu you can see your sickness level there. At the beginning of the game it'll be at level 5, and as the description indicates, you're severely influenced by the illness. I believe the sickness level will sometimes be reduced when you take a pill after suffering from a malaria attack; possibly, it'll only be reduced if you take a pill just after suffering an attack - if you wait too long, the sickness level may actually go up. Malaria affects your stamina, and having a lower sickness level will allow you to sprint, and hold your breath underwater, for a longer period of time; it also means that the actual malaria attacks will be less frequent. These facts alone make it worth reducing your sickness level.
As stated above, after you suffer a malaria attack there'll be a pill bottle icon on your screen. While you're not required to take a pill after that, there is an incentive to do so. While the pill bottle is on screen, you'll suffer malaria attacks more frequently, and for each of these outbursts your sickness level is likely to increase. This means that if you continue to ignore the malaria by not taking a pill, it'll simply get worse. While not taking a pill won't kill you (at least, not that I know of), it doesn't exactly help your situation either.
You can gain more pills by completing underground missions. These basically require you to deliver travel papers to stranded civilians at underground locations. I believe that you'll automatically get the chance to initiate an underground mission as your reputation grows. In the menu you can see if there is an underground mission available; if so, you can go to either the Church (in Leboa-Sako) or the Clinic (in Bowa Seko) and talk to the priest or doctor respectively. They'll give you travel papers and let you know where to deliver them. In exchange for the travel documents, the civilians at the underground locations will give you more medicine.
Once a new underground mission becomes available you may eventually run out of malaria pills if you don't pick up and complete the mission. It'll be rather clear when you do run out, since you'll stare down the empty pill bottle after you get out the last pill. While I don't think that you can actually die from malaria in the game, as I've explained above there are some good reasons to keep medicine in stock. This means that once an Underground mission does become available, you should complete it whenever you get the chance.
|
|
Named areas are unique locations in the game that not only provide some refreshing diversity, but they also come with their own detailed map and usually offer both supplies and vehicles; however, they're also occupied by enemies. Many missions take place at named areas, and for the most part you'll also be able to find at least one diamond briefcase here.
As you learned during the tutorial, you can tag various equipment at named areas using your monocular. Doing so will permanently add an icon of that equipment to the detailed map of the area. This equipment includes munitions (the three different types of piles), health cabinets, mounted weapons, sniper positions, and vehicles. These all come in different categories, and once you tag one item - such as an ammunition pile - within a category, all items in that category will be displayed on your map; this means that you don't have to tag every single item in an area, but only one from each category. The three caregories include:
|
| Reputation, or infamy, is a measure of how well known you are. By helping people - whether it's your friends or perhaps your enemies - you'll start to get noticed. You'll gain reputation when you complete primary missions and buddy missions.
As you increase your reputation, new underground missions will open up, allowing you to gain more medicine for your malaria condition. However, increasing reputation will also mean that enemies will start to carry better weapons. Initially you'll encounter enemies wielding weapons such as the G3-KA4 and the M1903 sniper rifle; after increasing your reputation they may have AR-16's and SVD's. Reputation comes in levels, and it's these reputation levels that dictate what types of weapons enemies will be carrying. I believe there are only four different levels; however, once you've reached the highest level, you'll be able to unlock new underground missions as you gain more reputation.
Besides the need to decrease your sickness level, and acquire more malaria medicine, I don't really see any points in intentionally increasing your reputation since it'll just end up making the game more difficult. However, if you don't mind that - or you're looking for more of a challenge - that's your call. If you don't want to increase your reputation more than needed, there is no real incentive to take on buddy missions... unless you just want to experience and complete them for fun, or perhaps if you've lost your best buddy and now need a replacement - or wish to have a specific buddy help you.
I think it would've been nice if your reputation affected more than just underground missions and enemy equipment, or at least if it came with some other type of reward - because as it is currently, I don't really see much of a reason to intentionally increase your reputation.
|
| No matter how powerful you become, you will always be at the mercy of your malaria symptoms. Keeping those symptoms in check requires medicine, and that medicine is only available from the civilians and the Underground cells that protect them. By assisting the Underground, you can earn a share of the medicine.
These missions are pretty simple - all you need to do is deliver passports to the different underground cells (found at so-called Underground Locations) around the area, allowing them to send civilians out of the country. In return, you'll get more medicine that'll help you treat your malaria. Each mission will effectively decrease the severity of your malaria (your sickness level), making it erupt less frequent. However, like with safehouses, the underground locations are guarded by militia - and to unlock it (or gain access to it), you'll need to eliminate them first. These militia only appear when you have an active, underground mission.
When an underground mission becomes available, you'll notice that the small "Mission Available" icon appears over the church in Pala (or clinic in Mosate Selao) and the Underground Locations you've visited; a note will also appear in the Menu screen indicating that an Underground mission has opened up. To start the mission you can do one of two things - either head to the church (or clinic) and talk to the priest or doctor; you can also go to one of the Underground Locations you've already been to and talk to the person inside. You'll be handed some travel papers and an objective marker will appear on your map. That's a different Underground Location where you need to deliver the papers. While you normally won't run out of malaria medicine, you may actually do so once an Underground mission becomes available; if you don't pick up the mission, you'll eventually run out which means that if you wish to keep your malaria in check, you'll need to complete Underground missions every once in a while.
|
|
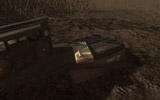
Because the game features some pretty large areas vehicles are an important part since you rarely wish to walk longer distances. Fortunately, vehicles can be found in many different areas - around towns, checkpoints, underground locations, named areas, and sometimes you may even find vehicles just sitting by themselves out in the open.
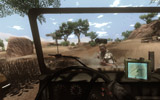
You can heal yourself and take a malaria pill while you're piloting most vehicles - I believe the only exception is the Hang glider. However, while healing (or taking a pill) you cannot actually steer the vehicle, so if you're driving make sure you've got a small stretch of open land ahead of you. While driving a vehicle you can hold down the left or right - or both - mouse buttons to look left, right or behind, respectively; release the button(s) to return to your original viewpoint. These "shortcuts" are useful since you don't have to manually turn around to look and back again to focus on the road ahead.
Most vehicles can be repaired if they sustain enough damage. If this happens, the engine will start to emit smoke; at first it'll be gray smoke, then black smoke, and after that the engine may catch fire. In the latter case it's too late to repair and the vehicle will blow up shortly after.
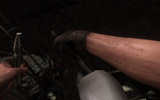
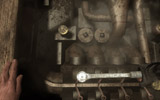
To repair a vehicle simply get out of it and face the engine (for cars this means the hood); a small wrench-like icon should appear. Press the Use key to start repairing it. It takes a bit of time for you to repair a vehicle, but you can abort the operation by pressing Use again. You can also get interrupted when repairing a vehicle (ie. by getting shot) which will also cause you to abort the operation. At the Weapons Shop you can buy upgrades that improve the durability of vehicles and reduce the amount of time it takes to repair them; the Vehicles page lists all vehicles along with the cost of their respective upgrade.
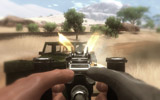
Assault Trucks, Swamp Boats and Fishing Boats all come with a mounted weapon. While you cannot use the mounted weapon while driving (or steering), you can switch to the mounted weapon at any given time; to do so, press the Change seat button (default C). Switching to the mounted weapon can be an effective strategy if you're being followed by another vehicle, or when you enter a checkpoint or a named area; the main drawback is that you are completely stationary when using a mounted weapon - while this isn't a huge problem when playing on normal difficulty, you can easily get shot to bits in no time on the higher game difficulties, at least if there are just a couple of enemies around. There is a bug in the PC version of the game which means that if you've bound the Enter/Exit and Change seat keys to other keys than their defaults, they wont work while you're manning the mounted weapon in a vehicle; you'll have to press the default Enter/Exit key (E) to exit the vehicle. Hopefully this will be fixed in a future patch since it's quite annoying to have to exit the vehicle only to get back into the drivers seat.
There are three types of mounted weapons: a light machinegun, a heavy machinegun, and a grenade launcher. While the light machinegun isn't the most powerful weapon (comparable to the light machineguns you can carry), both the heavy machinegun and the grenade launcher pack a pretty decent punch; in fact, encountering enemies in fully manned vehicles with either of the latter two weapons can be somewhat of a challenge. The heavy machinegun can chew you up in just a couple of shots, and the grenade launcher will take you down with just a shot or two.
The mounted weapons are fairly accurate, the main exception is the light machinegun which is pretty much useless at long ranges; however, since you can aim with mounted weapons (just like you can aim with regular weapons) you can increase the accuracy quite a bit. I rarely use aiming with the heavy machinegun or the grenade launcher since these are quite accurate off the bat.
While the vehicles offer different speeds and handling, the enemies in the game seems to be able to drive slightly faster than you (although probably not always as well). This isn't a huge issue, but it does mean that more often than not you may find a fully manned assault truck on your trail - and since you can't outrun it, your vehicle will quickly contain more holes than swiss cheese. In this situation, it's usually best to simply get out of your vehicle and deal with your pursuers; another approach, if you're in a vehicle with a mounted weapon, is to change position and take out the enemies with that weapon if possible.
Enemies in vehicles that does not have a mounted weapon will often try to ram you, and attempt to force you off the road. While this is not nearly as annoying as having an assault truck on your back, the enemies tend to do a good job of ramming your vehicle, often forcing into trees or rocks. This will not only damage your vehicle, but if you're unlucky you'll hit an object dead on, forcing your vehicle to come to a complete stop. While enemies drive vehicles fairly well, they're not always as good at driving around objects - if you take the chase off road, you can weave in and out between trees and rocks - you may often see your pursuers ram into the objects which gives you a perfect opportunity to escape.
If you do get out of your vehicle while being pursued, keen an eye on the enemy vehicle; usually they'll speed up just before they come to a full stop, and if you're on foot you can easily get run over if you're not careful. A good strategy is to stop your vehicle near a solid object (such as a tree or a rock), if possible, and take cover behind it so that you're not easily run over.
|
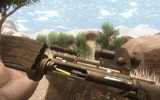
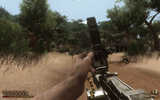
| As weapons are used they become less reliable and for the majority more likely to jam. If a weapon becomes jammed you can tap the Reload key to unjam it. Needless to say, while a weapon is jammed it cannot fire which obviously can be rather unfortunate in a fire-fight. Sadly, it doesn't seem like you can change weapons while unjamming a weapon, which really doesn't make any sense - but I guess it just makes unjamming a weapon something you need to consider if you're in a fire-fight. Severely worn weapons may even explode in your hand; while this only hurts you a little bit, it means that the weapon is destroyed and you'll have to pick up (or buy) a replacement.
All weapons you pick up from enemies are worn; they will fire but they are often very prone to jamming. Once you have enough diamonds to buy weapons, I'd recommend that you do so - especially since a weapon, once bought, will come in endless supply (for free) from the building next to Weapons Shop. A few select weapons such as rocket launchers wont jam but instead misfire. This usually means that the rocket (or projectile) will fly out of control or simply not detonate on impact. At the Weapons Shop you can buy upgrades to your weapons that will make them more reliable and thus less prone to jamming and misfires. For a list of weapons that are available in Far Cry 2 please refer to the Weapons page. As soon as you buy a new weapon, the upgrades for that particular weapon will automatically be unlocked; this will happen when you leave the PC after bying a weapon, however, so you need to Use the PC again to see the new upgrades.
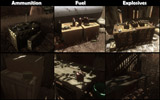
There are three basic types of munitions in the game:
- Ammunition covers weapons that fire bullets, ie. pistols, assault rifles and sniper rifles.
- Explosives cover both thrown grenades and weapons that fire grenades or rockets.
- Fuel covers the flamethrower, the Flare Pistol, and Molotov cocktails.
Both ammunition, explosives and fuel come from two different sources. You have the large supply which is represented by so-called piles. These are large crates with three batches of munitions on top of them; each batch from a pile will completely replenish your munitions of that particular type. There are also smaller "versions" of the piles - smaller batches of ammunition, explosives and fuel. They will only give you a limited amount when you pick them up.
The munitions piles can be destroyed if they take enough damage; while you rarely intentionally want to destroy a pile, it can sometimes be a satisfying strategy to target a pile if there are enough enemies around it. While explosives and fuel piles will simply explode, ammunition piles will have the ammunition going off like fireworks, shooting in all directions. I believe a destroyed pile will eventually respawn.
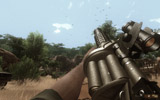
| Some of the weapons take quite a bit of time to reload - these include the MGL-140, PKM and the M-249 SAW. For some of the weapons you can reduce the reload time by taking advantage of a small exploit. When you reload certain weapons you may notice that the ammunition indicator in the lower right corner is replenished before the actual reload animation ends; this is especially true for the machineguns. Once the ammo indicator is replenished you can simply switch to a different weapon while the reload animation is still in progress; change back to the weapon you were reloading and you should now find it fully reloaded and ready to fire. This trick can shave off a good second or two of the entire reload process.
|
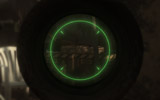
I've compiled an image that displays what each scope looks like - or rather, what looking through the scope looks like. I guess this one's for all you gun nuts out there  . The image basically allows you to compare the different scopes, and see which ones are the most effective - at least when it comes to the magnification level. . The image basically allows you to compare the different scopes, and see which ones are the most effective - at least when it comes to the magnification level.
-
It's pretty clear that the AS50 and the monocle come in first place; the AS50 wins though since it's actually a weapon, unlike the monocle, and the scope obscures less than the monocle.
-
The M1903 and the Dragunov SVD takes second place with equal magnification - but the M1903 is slightly better because the scope itself doesn't obscure as much as the one on the Dragunov SVD.
-
Surprisingly, the scope of the MGL-140 provides a good amount of magnification.
-
The Dart Rifle is next, with magnification that is very close to the MGL-140.
-
The second last place is taken by the Carl G Rocket Launcher.
-
The final place is taken by the AR-16 which has a reflex sight that doesn't appear to provide any magnification at all.
The machete is a versatile weapon as it can be used not only for close combat, semi-stealthy kills and finishing off downed enemies, but you can also use it to break boards that sometimes cover up entrances. You'll often find that even enemies who fall down after being shot are not necessarily dead; they may lie there screaming for help, and sometimes they pull out their pistols as a last defense. As they are on the ground you can move in and perform an elaborate finishing move with the machete.
You can unlock two extra machetes simply by creating a profile for online multiplay; you don't have to play online, simply creating a profile is all you need. To do so, go into the menu, select Multiplayer and click the Create button at the bottom of the screen. Select Online as the profile type and continue with the registration process; during this you'll be asked for your online key - this is the same as your CD key (or Install keycode). Once complete, you can now - while not in a game - go into the Options menu and click Game - you should have a new option available: Machete Type. There are three types of machetes: modern, primitive and homemade. While I believe the difference is merely in what the machete looks like (and not how much damage it does), it's still a welcome customization feature.
|
|
 Additional Content
 Buddies
 Checkpoints
 Diamonds
 Difficulty
 Exploration
 Health
 Jackal Tapes
 Malaria
 Named areas
 Reputation
 Underground Missions
 Vehicles
 Weapons & Weapon Reliability
 . The image basically allows you to compare the different scopes, and see which ones are the most effective - at least when it comes to the magnification level.



 , I've also compiled standard lists that can be found in the






 - @dawnrazor73